
As business owners in our digital age, EVERYTHING comes with a visual. The best brands tell a story with their images, whether it’s about a person, product, or lifestyle, your target audience wants to see what you have to offer. If you want to stay competitive, you need to showcase your brand in the best light (photography pun fully intended!). While I always advocate for seeking out professionals when it comes to telling the story of you and your brand, the reality is there are going to be moments, whether showcasing a new product, giving your audience a look behind the scenes, or showing off your day to day lifestyle, that require you to step in as the photographer.
I’m here to empower you with five professional tips and tricks for photographing lay flat products with your iPhone. Yes, even as a professional photographer, I really love to use my iPhone, along with my professional equipment, on a daily basis. Your smartphone has the ability to take amazing photos quickly and efficiently, so let’s get you confident using it to propel your business and get the attention of your target audience.
Before we get started with our 5 tips, there are a few things you can do to ensure you jump right into taking great photos each time as well as save time on the front end! Here are some features to turn off and be familiar with when working with your iPhone camera to ensure you are making the most of each image and eliminating steps later.
Flash: Open the camera on your iPhone, at the top you will see a lighting bolt, click that and select off. You want to choose when to use a flash and when not to, so turning it off says you don’t want to use it for now, don’t worry if you ever do want to use it, just click on the lighting bolt and select On.
HDR: Click on HDR, right next to the lighting bolt and select Off. HDR stands for High Dynamic Range, it can be used to really help capture all the darks and lights in an image. However if not used correctly, it can look harsh and pixelated. HDR definitely has its benefits, but takes some practice. That’s for another post, so for now, just turn it off.
Live mode: Right next to HDR is a circle with three rings, this is live mode. If the circle is yellow then it’s turned on and creating a moving photo with each image you take. So, if you snap a photo there is actually a few seconds of movement and sound included with each image. While it can be super fun to use, the file sizes are larger and it’s not necessary to take a live image at all times, so I turn it off and only turn it on when I want to use live mode for a specific moment.
Now that we have certain settings turned off, you are ready to begin!
-
You don’t need a particular app to take great photos.
Simply using the camera feature on your iPhone is the best place to start. This is less overwhelming and you probably know more about it than you think. You can make various edits, adjust the brightness of a photo, focus and even get amazing depth of field, if you have an IPhone Plus with the Portrait Mode feature.
-
Look for good, even lighting.
Photographing your products next to some beautiful even window light or an open door will make a world of difference in having a dynamic well lit image. The light needs to be even, which means no harsh shadows where you can see the outline of your blinds or curtains coming through. You can even be outside, but be aware of harsh light, you will still want to be in some sort of shaded area to avoid harsh shadows and too much light. A cloudy day outside can be a perfect studio!
One more tip when finding that nice even lighting, you also want to make sure that light doesn’t have a color cast to it. For instance, if you are shooting in a room that’s painted red or are around a lot of bricks, you will get a warm red/orange tint to your photos. Same goes for shooting outside, if you are completely enclosed by trees and grass to get shade, you will get a green cast on your subject. Look for neutral colored rooms—white, grey, beige—and if you are outside look for a sidewalk or house with white siding to help bounce some softer, more natural light back into your photo and alleviate some of the green tones!
Below is an example of even, neutral colored lighting coming from an open front door.
-
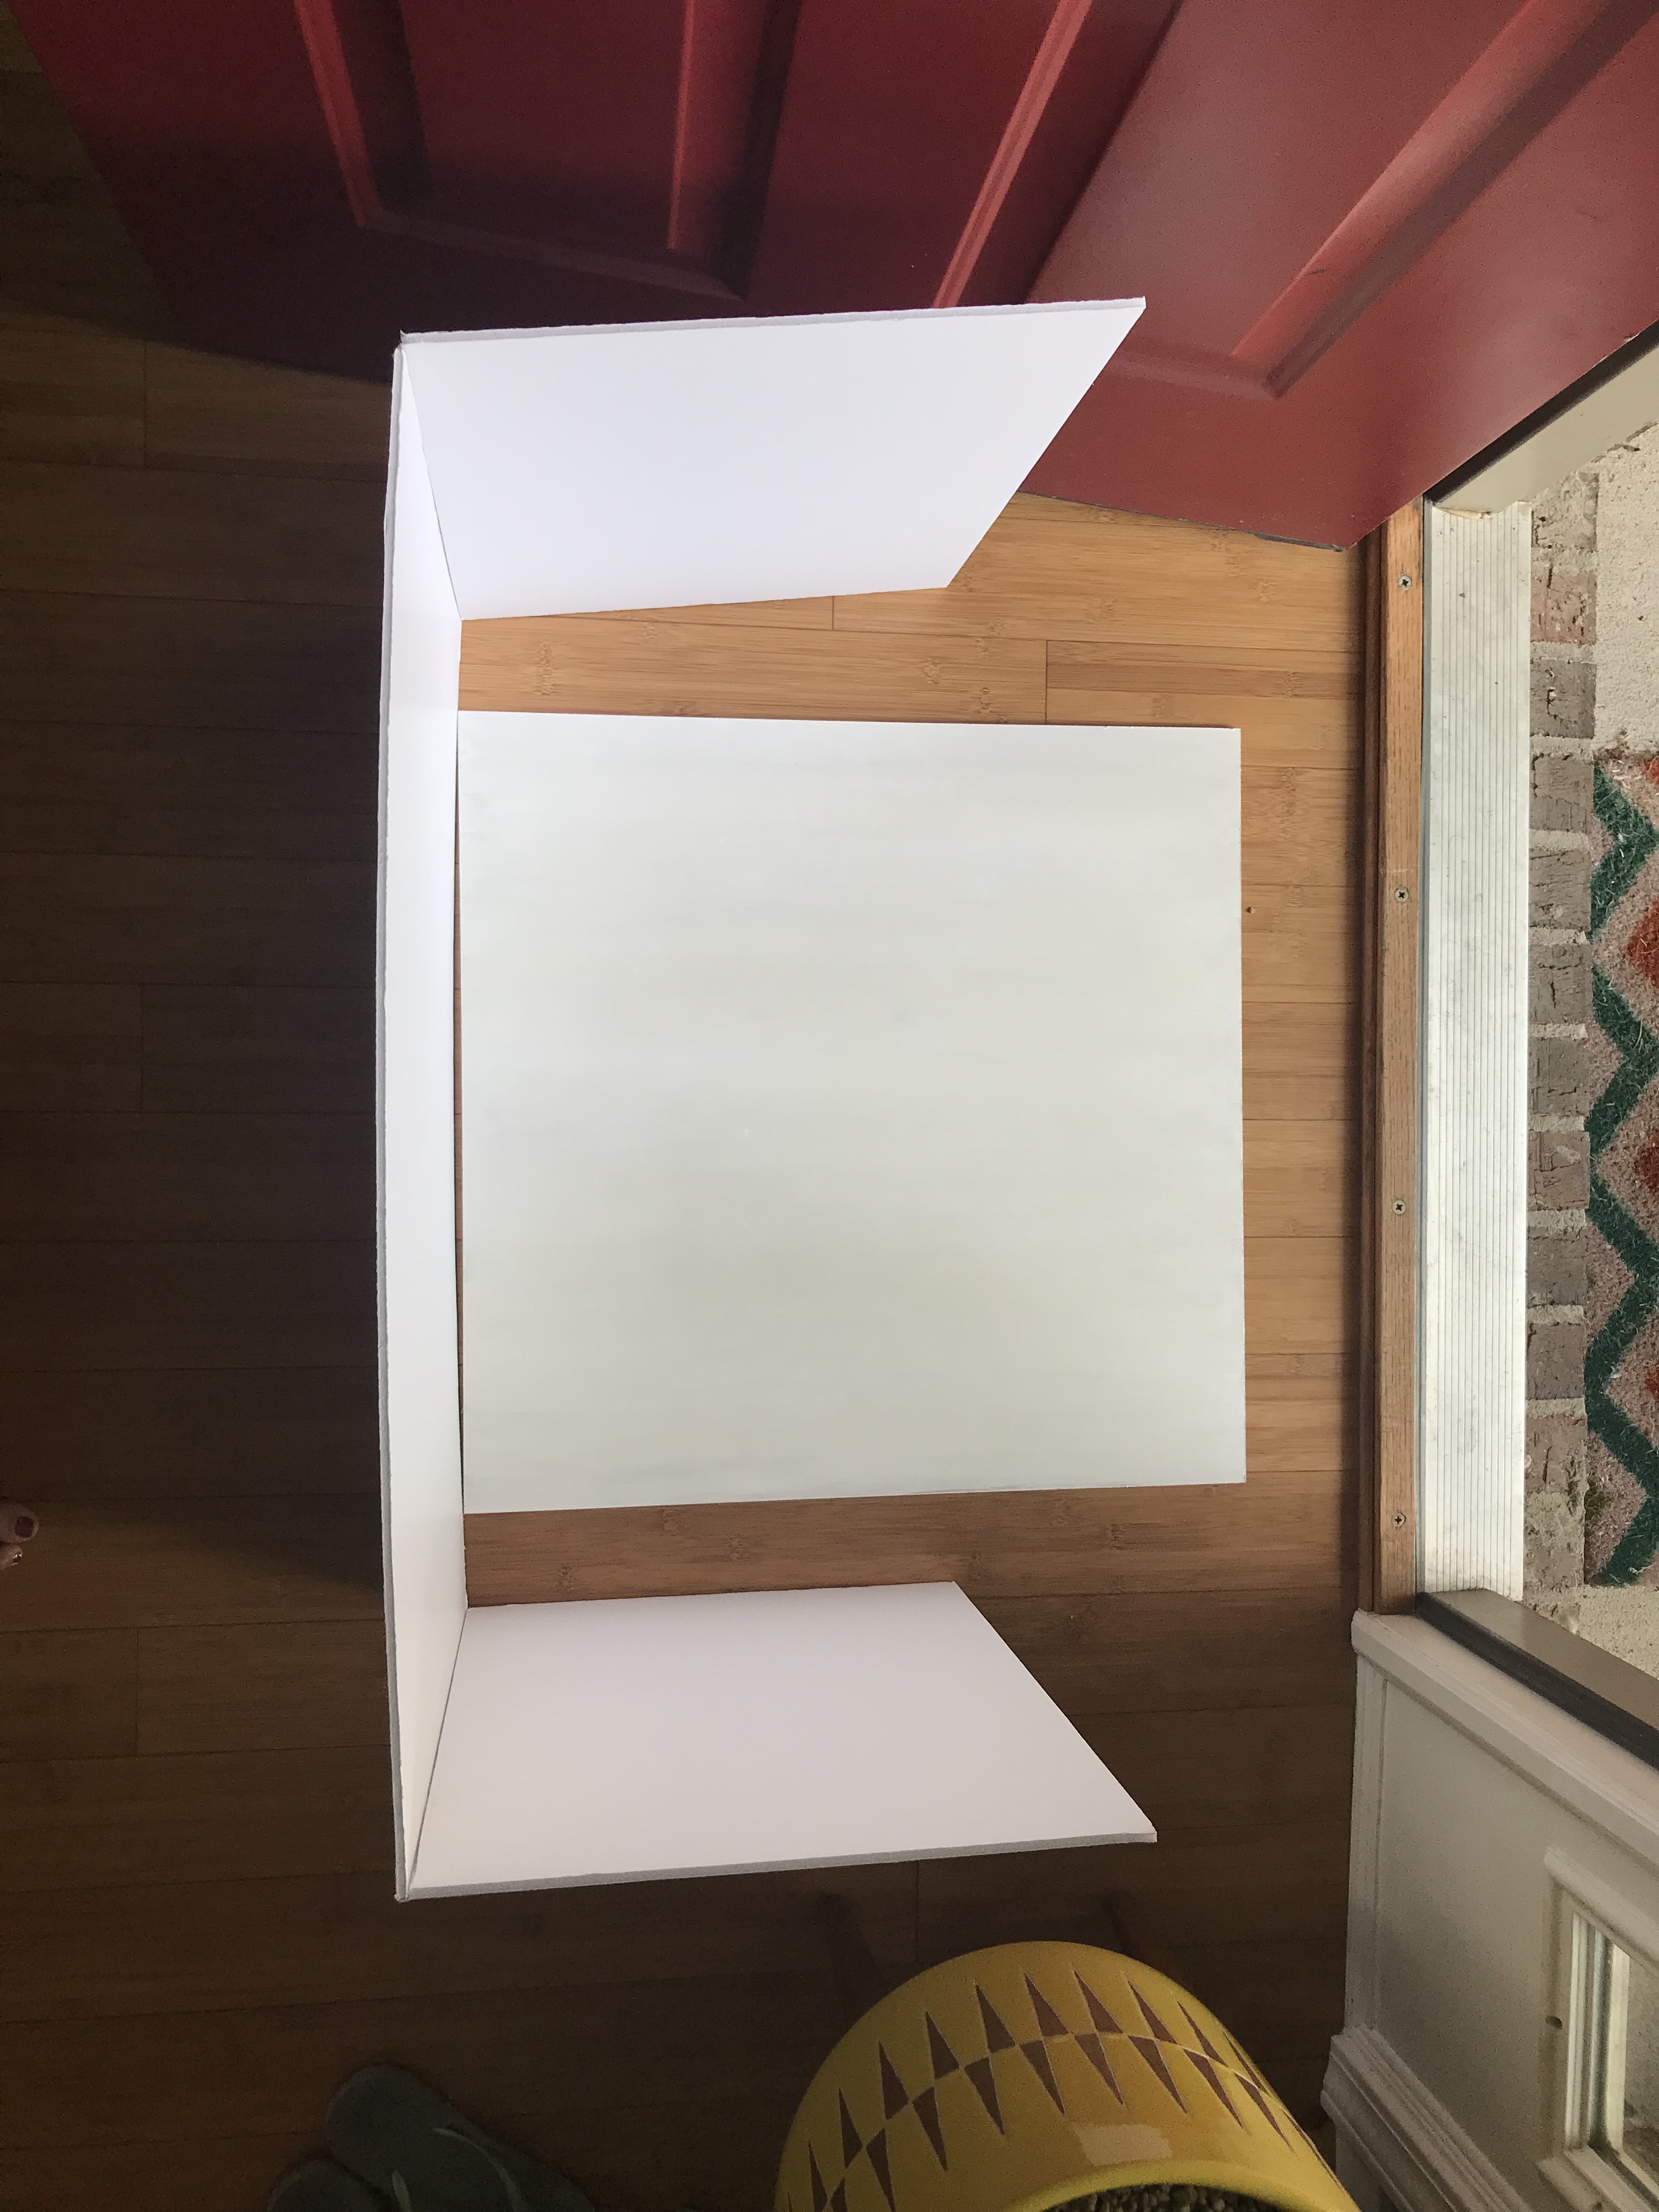
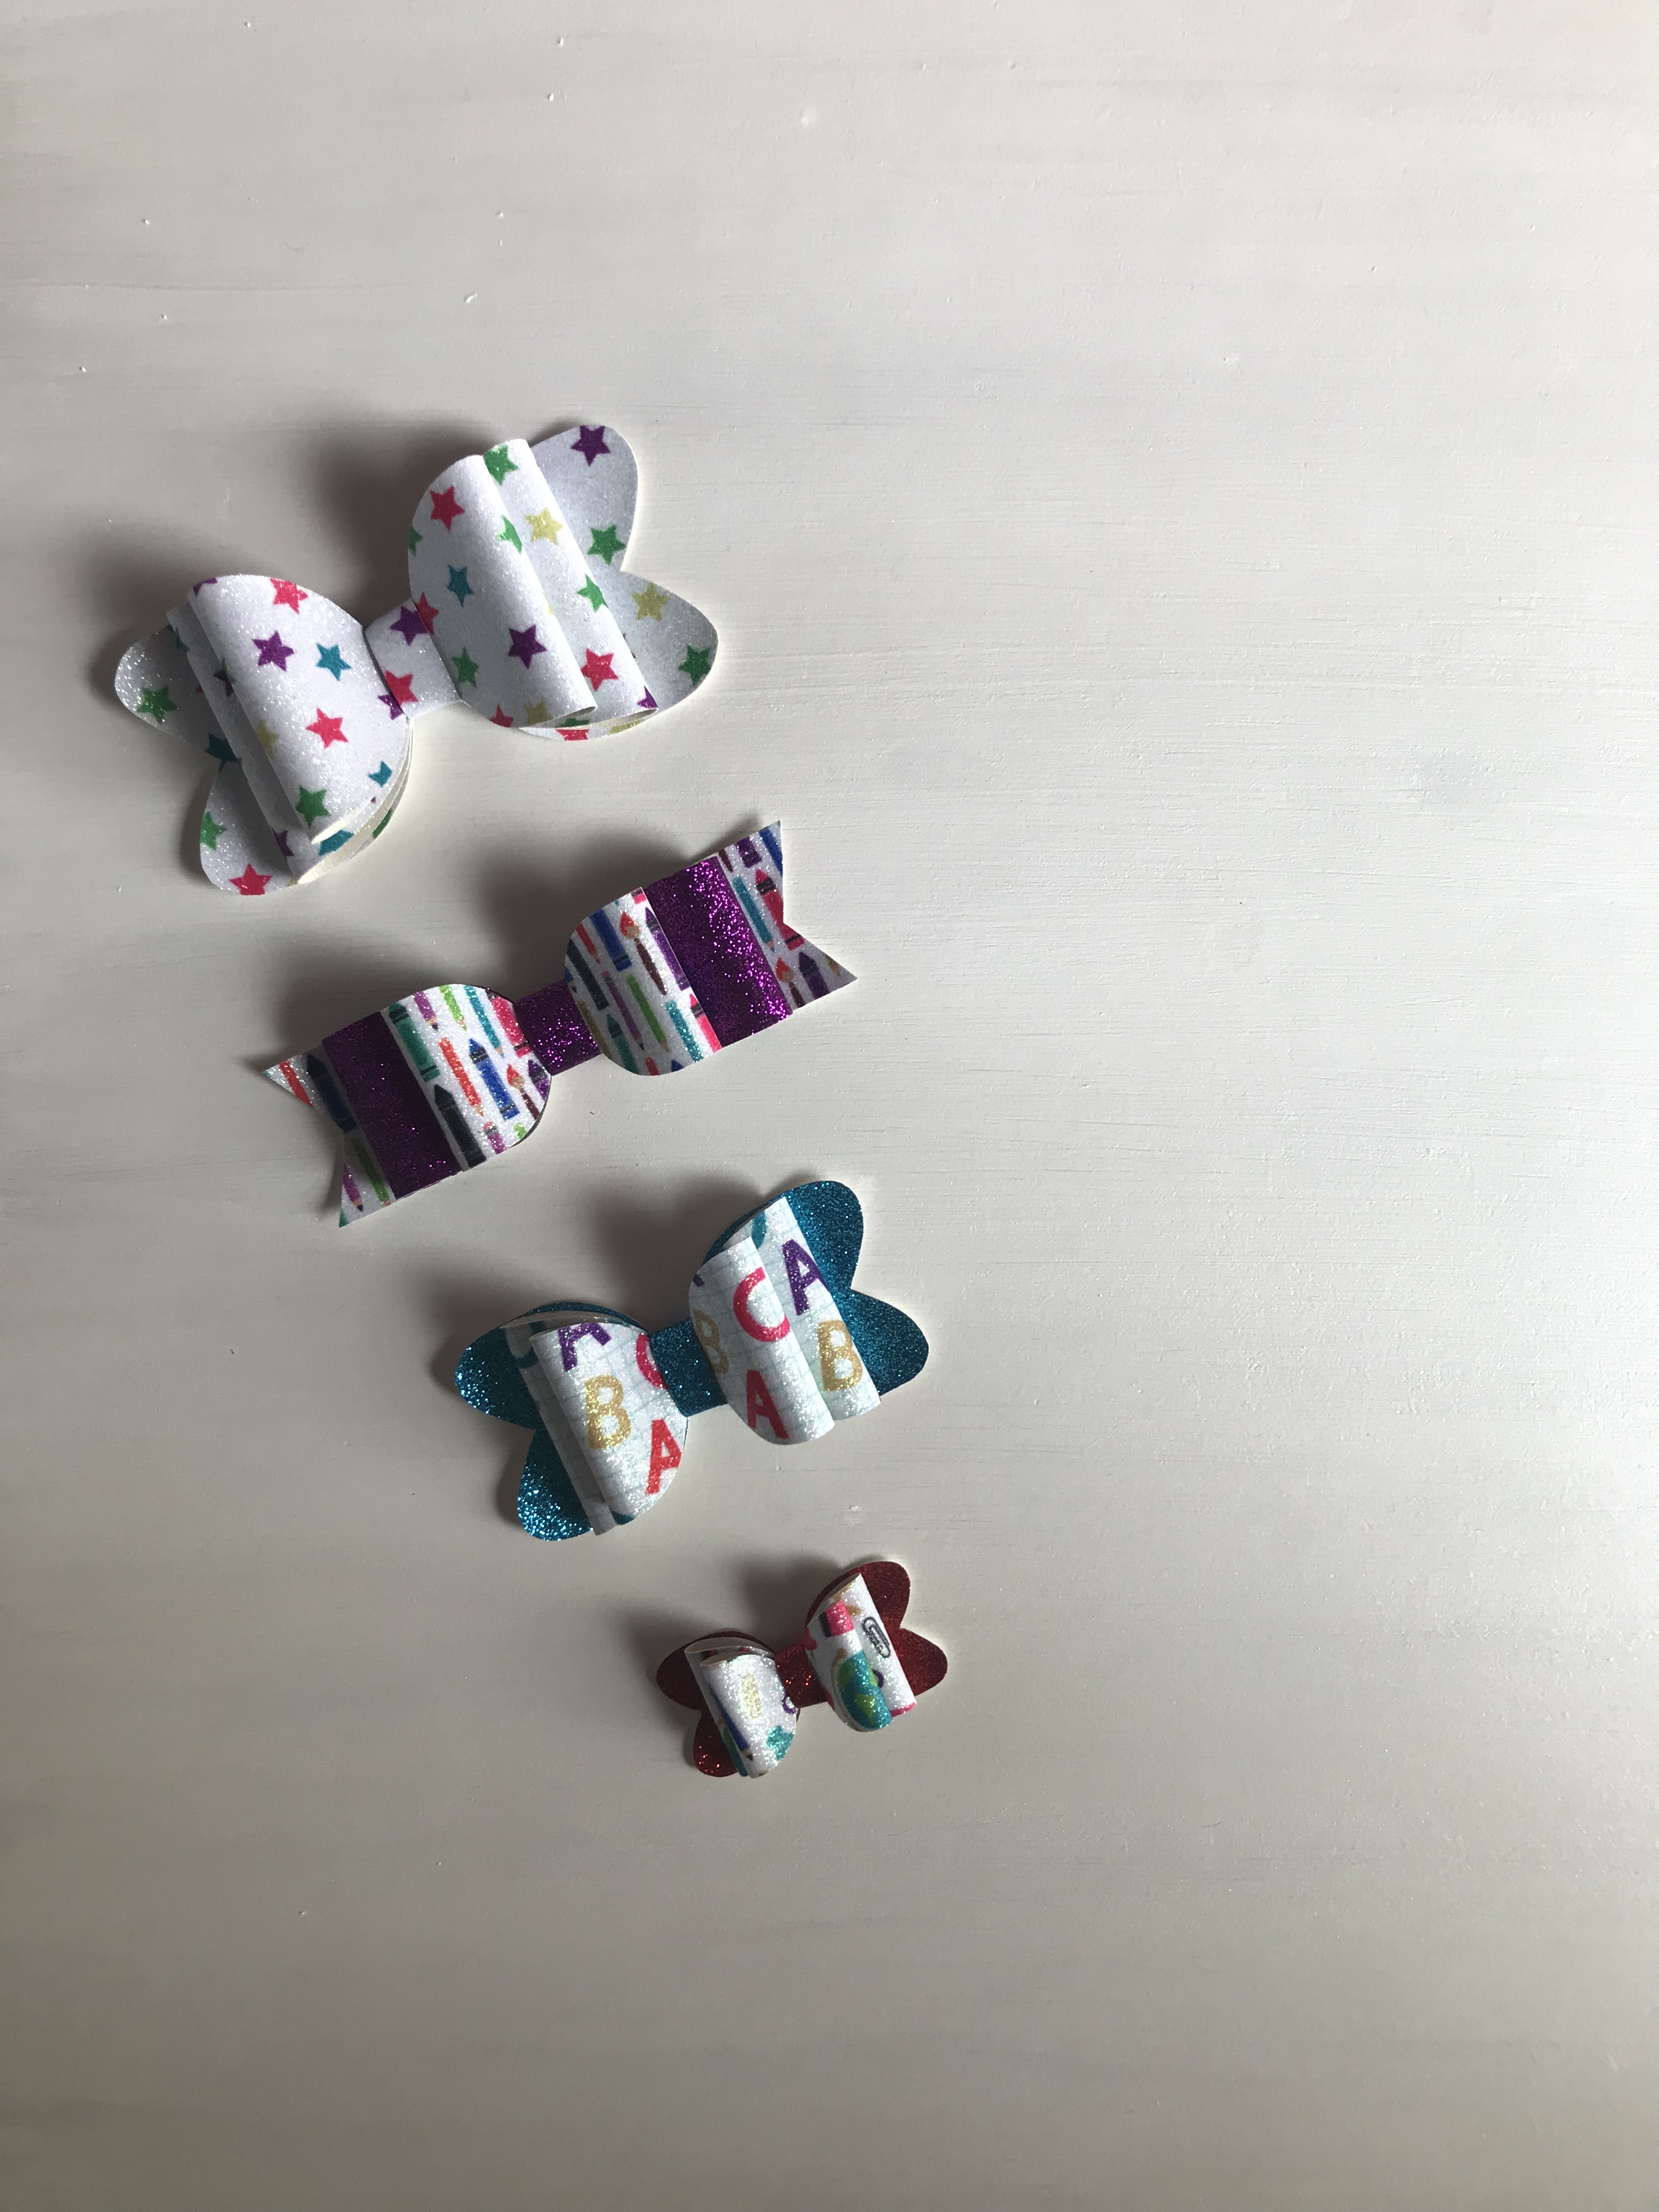
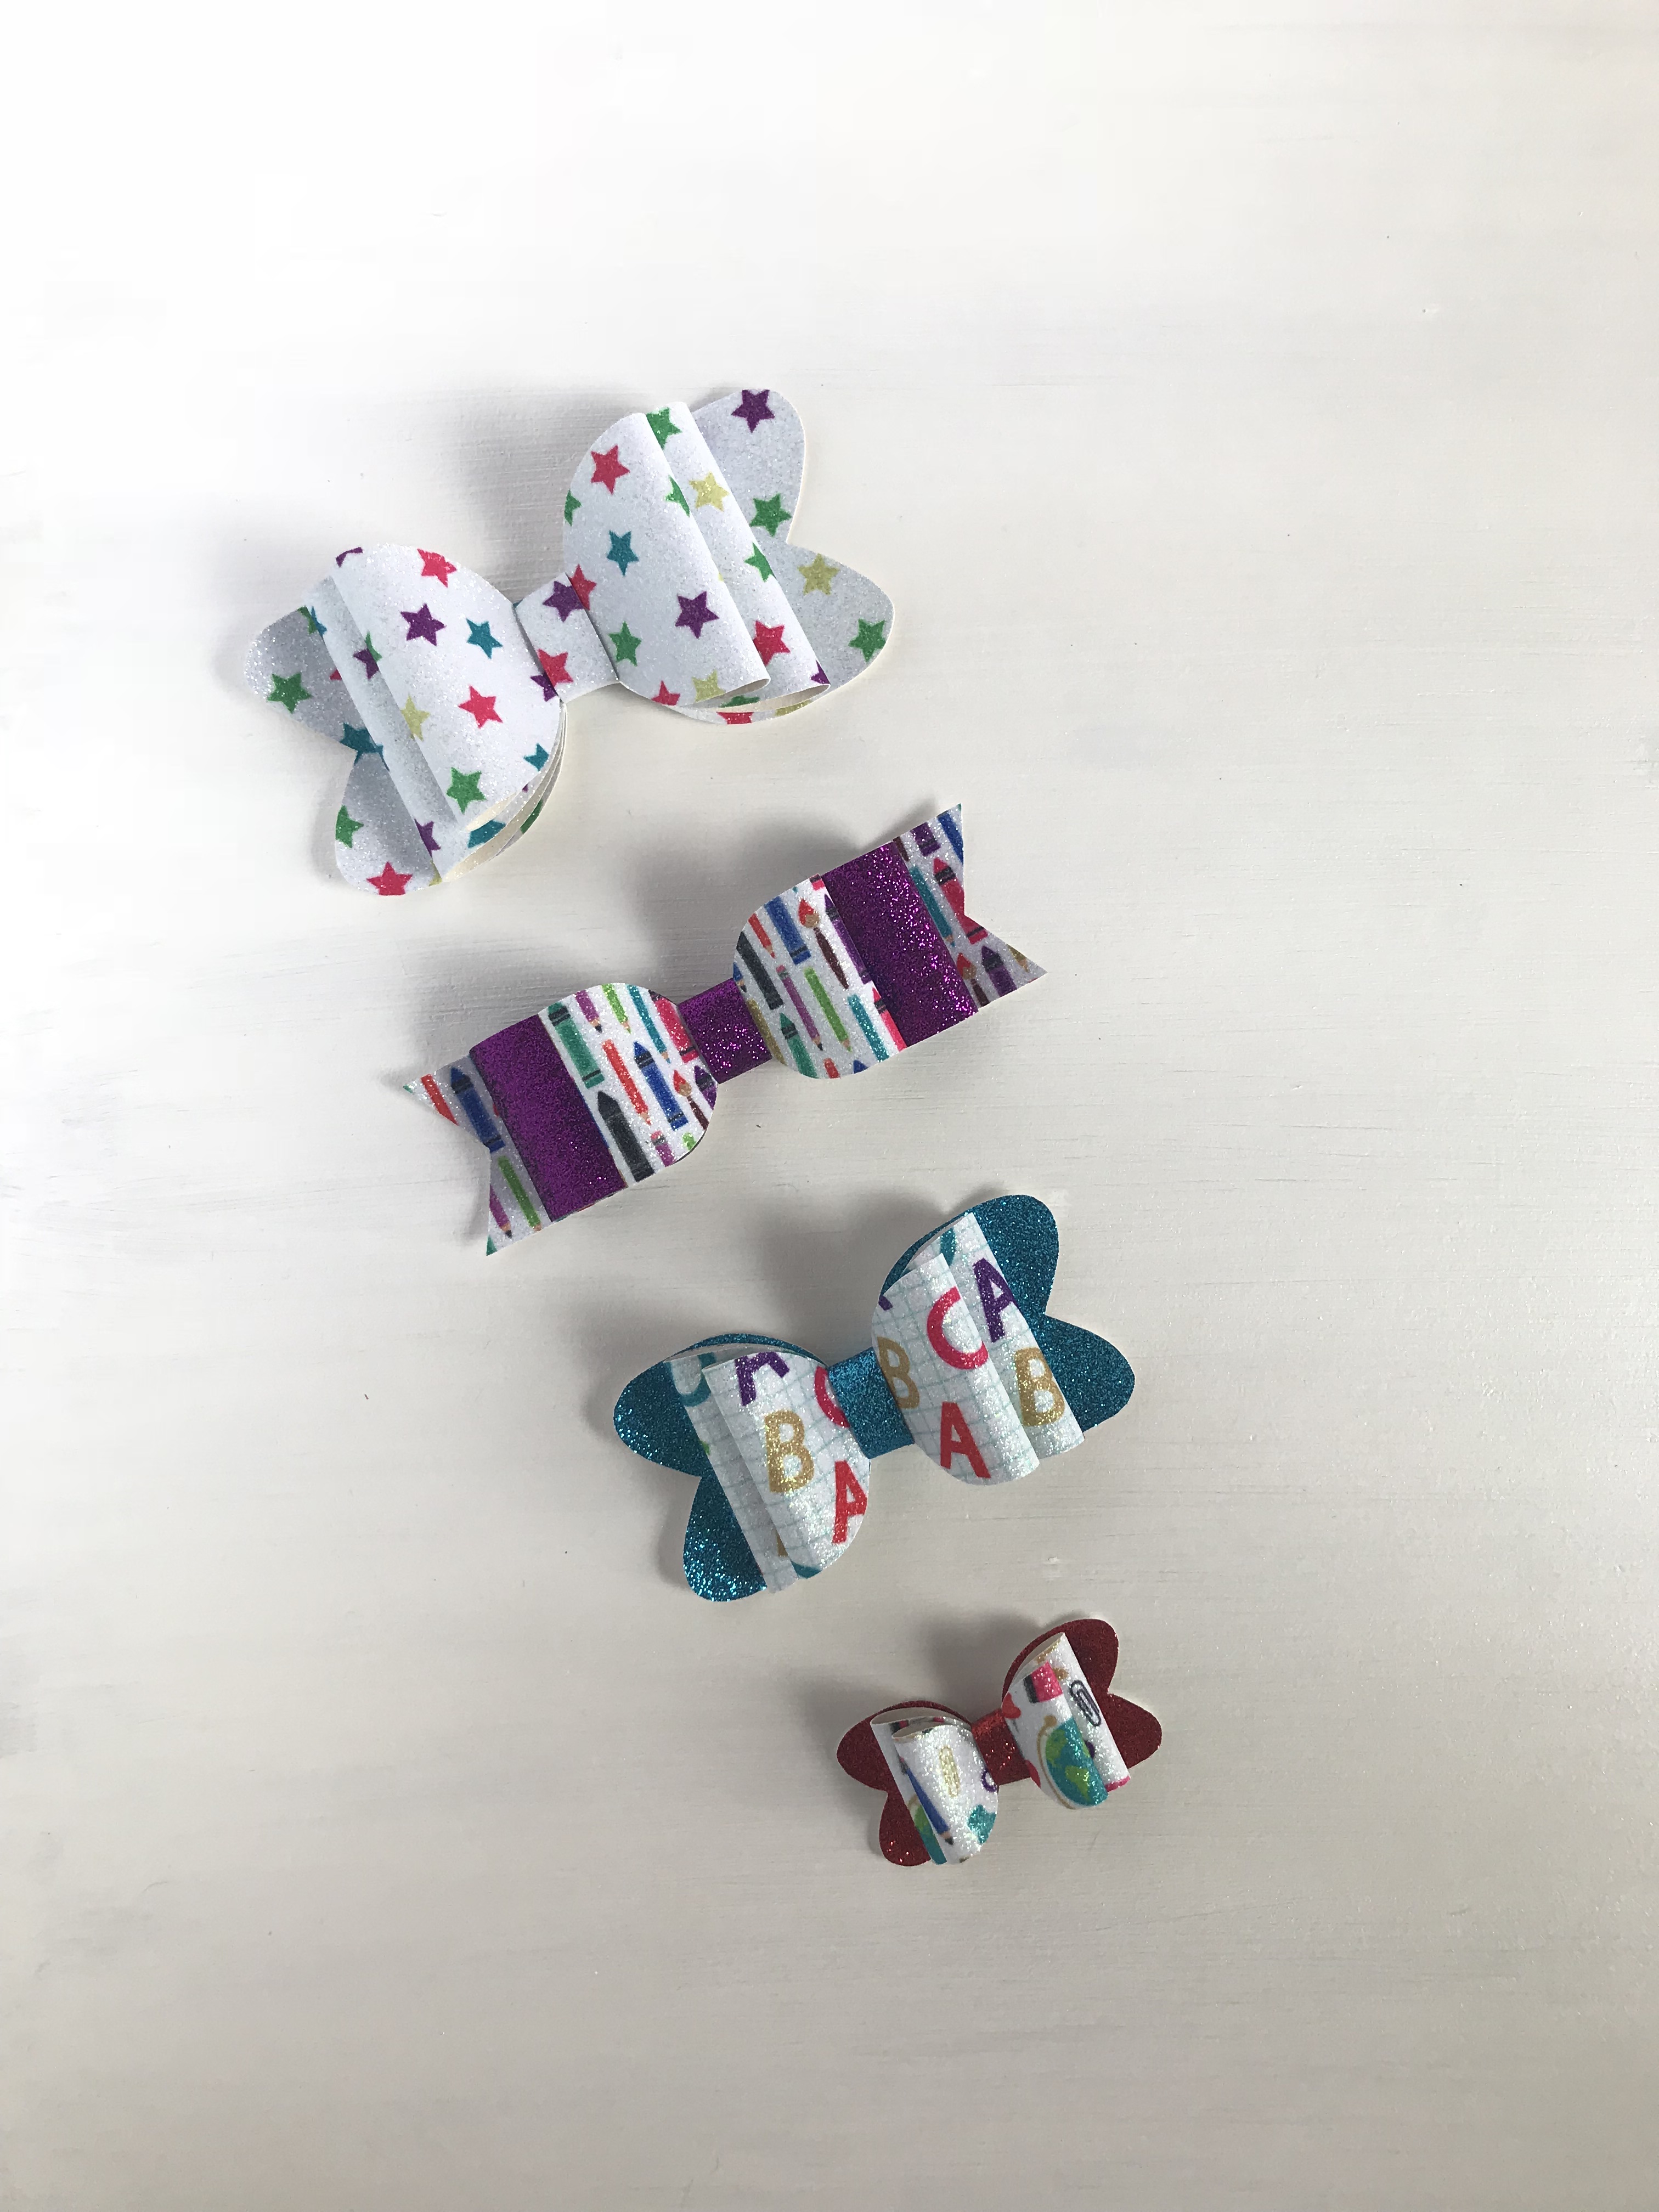
Add a white fill card to help with shadows.
Once you have found that great even lighting, you may still notice that one side of your product is darker than another, creating some shadows. To get that nice bright airy feeling, you need to bring in a reflector or fill card to bounce some of that beautiful window light onto the other side of your subject and fill in the shadows. You don’t have to purchase a professional reflector. You can make one and may even have the materials at home! Depending on the size of your product or subject, you may need a larger or smaller board. The easiest thing to do is purchase a basic white tri-fold presentation board (like a science fair presentation board), or you can purchase white poster board and make your own tri-fold with tape. I’ve found the presentation boards stand up on their own the best, but you can get creative! Simply place the board on the shadow side of your product, opposite of the window and watch it fill in the shadows!
The photos below show what the product looks like with (left) and without (right) using a fill card to help with shadows.
-
Get the perfect exposure & focus.
Now that you have found great light and filled in the shadows, it’s time to take a test shot. If you have an iPhone Plus, you have the option to use Portrait Mode, which allows you to get a really shallow depth of field look in camera that many people like. This feature works best when your subject is in a well lit area. If you are shooting something in a darker situation, this mode will not work as well and will have blur. In order for the depth of field to work, you also need to be within a certain distance of your subject (don’t worry, it will give you a warning). Depending on how close or far away your subject is, it may work best to stick to the default PHOTO mode.
Hold your camera over the subject and frame up your shot the way you want. Tap on the screen where you want your focus point to be. You may notice that once you tap on the area of focus, your lighting changes a bit. That’s totally okay! You can adjust the light on screen to be brighter or darker depending on your needs. To the right of your focus point you will notice a sunshine. Lightly press down on the sunshine icon and move your finger up or down to adjust the brightness. Moving up will make the image brighter and down will make it darker. Make those adjustments until you have reached your preferred exposure. Take an image and see if you are happy with the exposure. If not, try again and make any necessary adjustments.
Need a visual? Watch my Exposure Demo.
-
Easy editing and final touches.
After you have taken the perfect photo, open your images through the Photos app on your phone, and click on the image you want to edit. Once your image is open, at the top right of the screen, you will see an Edit option, select that and you will be able to make adjustments. Use the crop tool to straighten up or “crop” your image in tighter. Use the three circles icon to choose a filter if you would like to use one. Choosing a filter is where most people stop, but I encourage you to take it a step further, to help your images stand out and look their best.
After selecting a filter (or not), click the dial icon at the bottom next to the three circles. This will bring up three more editing options for you to explore: Light, Color and B&W. Click on the Light icon drop down menu and you will see several options such as highlights, shadows, brightness, and contrast. Click on the different options to see how they will affect your image, maybe bringing up the shadows a bit is exactly what you need to perfectly expose and bring to life your image. Or maybe it’s adding a bit more contrast or even bringing down your highlights, so that certain parts of the image aren’t too bright. Explore each of these settings to see if they need adjusting or are great right where they are. After you have made all the adjustments, make sure to click “Done” in the bottom right corner to save your changes.
Seeing good light, getting a rhythm with your editing process, and creating your personal style for images takes time and practice! Give yourself plenty of grace when trying to find the best light, getting your focus on point, and everything looking its best. This will be refined over time. You will figure out what you like and don’t like once you have the basics down. Overall, remember to have fun and break the rules from time to time. Get more creative with your images and let your personality shine through. It’s progress over perfection every time!
About the Author
Jessica McIntosh

Jessica McIntosh Photography
Visual Brand
Jessica McIntosh is an expert in women’s portraiture and branding photography. With a focus on vivid storytelling and unmatched authenticity, she specializes in curating a visual representation of clients’ life and brand through photography. She does’nt want to give you or your company a makeover, she wants to prove you don’t need one by bringing to life the story you’re already telling.
Get Social: Facebook | Twitter | Instagram | LinkedIn | Pinterest